The update process with a Raspiblitz virtualized on Proxmox basically works exactly the same as with a Raspiblitz on a Raspberry Pi. The process looks like this: Click on Relase Update in the Raspiblitz menu, shut down the Raspi, flash the SD card with the new image and then restart the Blitz. This process can also be adapted in the virtualized setup. The following steps describe the update process as I do it. Please note here: There are several ways in which you can update your Raspiblitz to Proxmox.
- Create a new fresh debian VM in parallel
- Install Raspiblitz with the latest version on it
- Shut down the new VM
- Click on update in the menu of the “old” Raspiblitz
- Shut down the “old” VM as well
- Mount the hard disk with blockchain etc. from the old VM into the new VM
- Start up the new VM
Install new VM
The VM set up in parallel can be done in exactly the same way as in the instructions HERE. It is important to note: Only add the external hard disk after the installation. So first install Debian (download link), log in via ssh with the newly created user and execute the following commands:
wget https://raw.githubusercontent.com/raspiblitz/raspiblitz/v1.11/build_sdcard.sh

sudo bash build_sdcard.sh -f false -d headless -t false -w off
If wget is not yet installed: sudo apt install wget
The new Raspiblitz is now installed. You can shut down the VM you have just created after successful installation.
Make the “old” Raspiblitz upgrade ready
Before you shut down the old Raspiblitz, select the following points in the menu:
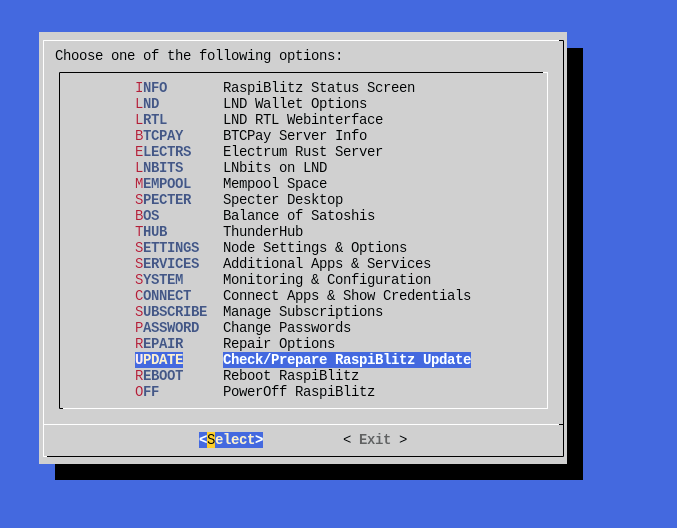
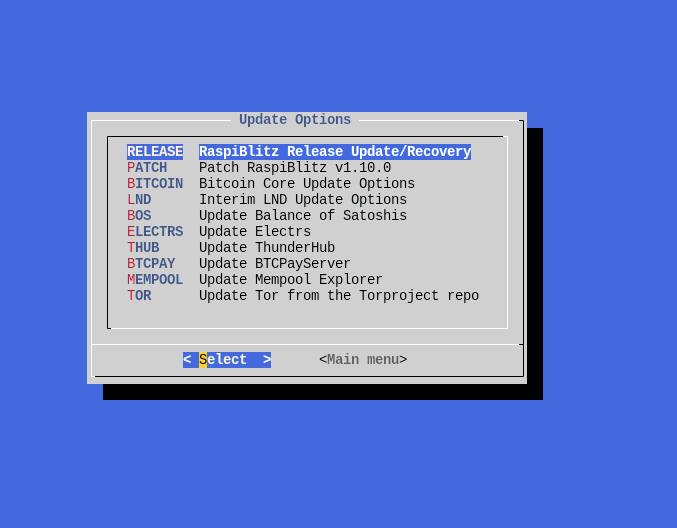
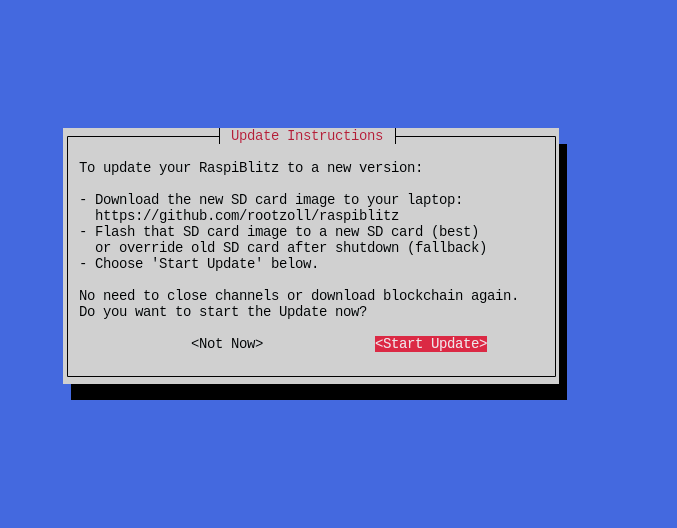
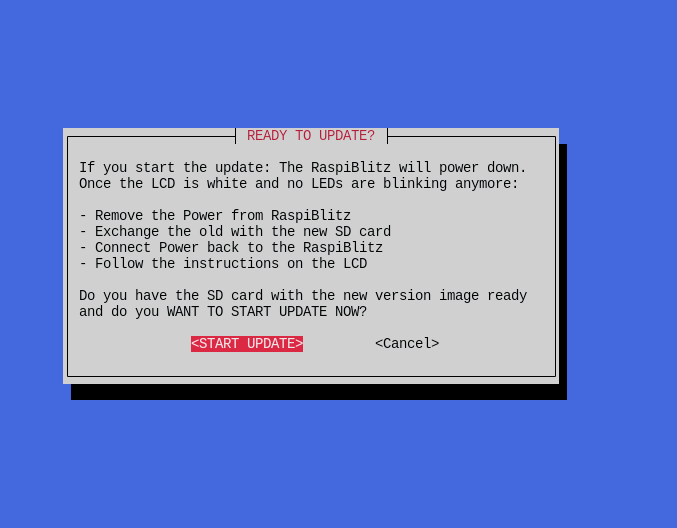
The old Raspiblitz will then make a backup of the LND folder on the external hard disk and then shut down.
Both VMs are now offline.
Mount hard disk in new VM
Old VM -> Hardware -> Click on Harddisk (recognizable by its size) -> Click on “Disk Action” at the top -> Reassign owner -> Select the new VM
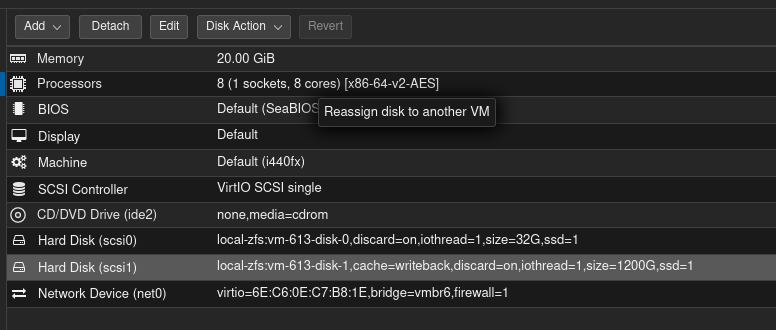
If you have set the “Start at boot” option in the options, change this to “no” for the old VM and to “yes” for the new VM. Otherwise, both VMs would start at the same time when Proxmox is restarted.
If you want to have the same IP address on the new VM despite DHCP, I recommend copying the MAC address under Hardware -> Network Device from the old VM to the new VM. The DHCP server then recognizes the new VM as the old one and assigns it the same IP. If you are working with a DHCP reservation, I recommend this even more, as you do not have to edit the reservation.
Now start the new VM, connect to the new VM with the default login information (user: admin, pw: raspiblitz). You will first be asked to set the passwords. You can use the same ones as for the old Raspiblitz.
Passed hard disk
If you do not have a virtual hard disk for the blockchain etc., but a physical hard disk that is passed directly to the VM, you can use the commands HERE in these instructions again as normal, as if you were creating a new Raspiblitz:
ls -n /dev/disk/by-id/
/sbin/qm set [VM-ID] -virtio2 /dev/disk/by-id/[DISK-ID]
Important points:
Make sure that both VMs are not running at the same time. Especially if you have copied the Mac address from the old to the new one, this can lead to network problems. If the upgrade process was successful, you can delete the old VM.
If you learned anything from this tutorial, I would be extremely happy to receive a donation:
Donation via Lightning Address: cercatrova21@Ln.tips
